5 Ways To Deal With Crawl Space Air
The air in a crawl space can have a huge impact on a home’s durability and indoor environmental quality. A building science expert, Allison Bailes says that contractors have several options to deal with air in crawl spaces. In this article he details the five options and how they stack up for meeting your customers’ needs.
The air in a crawl space can have a huge impact on a home’s durability and indoor environmental quality
If you have a home with a crawl space—or are building or buying one—you have several options on what to do with that particular foundation type. Most crawl spaces are vented to the outdoors, but over the past decade, encapsulating the crawl space (as shown below) has gained favor among builders of green and energy efficient homes. It’s often seen as the best way to eliminate the moisture problems that often result from vented crawl spaces. But what do you do about the air down there?
Before we address that question, however, let me point out that encapsulated crawl spaces are great for humid climates, like the Southeastern US. In a dry climate, it may or not be worth the cost to encapsulate. So, as always, do what’s most suitable for your climate.
Basically, your options are to do one of the following:
- The tried and false method of venting the crawl space to the outdoors
- Putting a little bit of supply air from the HVAC system into the crawl space
- Using an exhaust fan to move air from the crawl space to outside
- Installing a dehumidifier
Let’s take a look at each of these methods.
1. Vent the crawl space to the outside
Do this in a humid climate, and you’re asking for trouble. The outside air that you bring into the crawl actually has more moisture in it than the crawl space air you’re venting to the outside much of the time. Although the psychrometric chart shows mathematically why it doesn’t work, a look into just about any vented crawl space in the Southeastern US proves that venting to the outside is often a disaster.
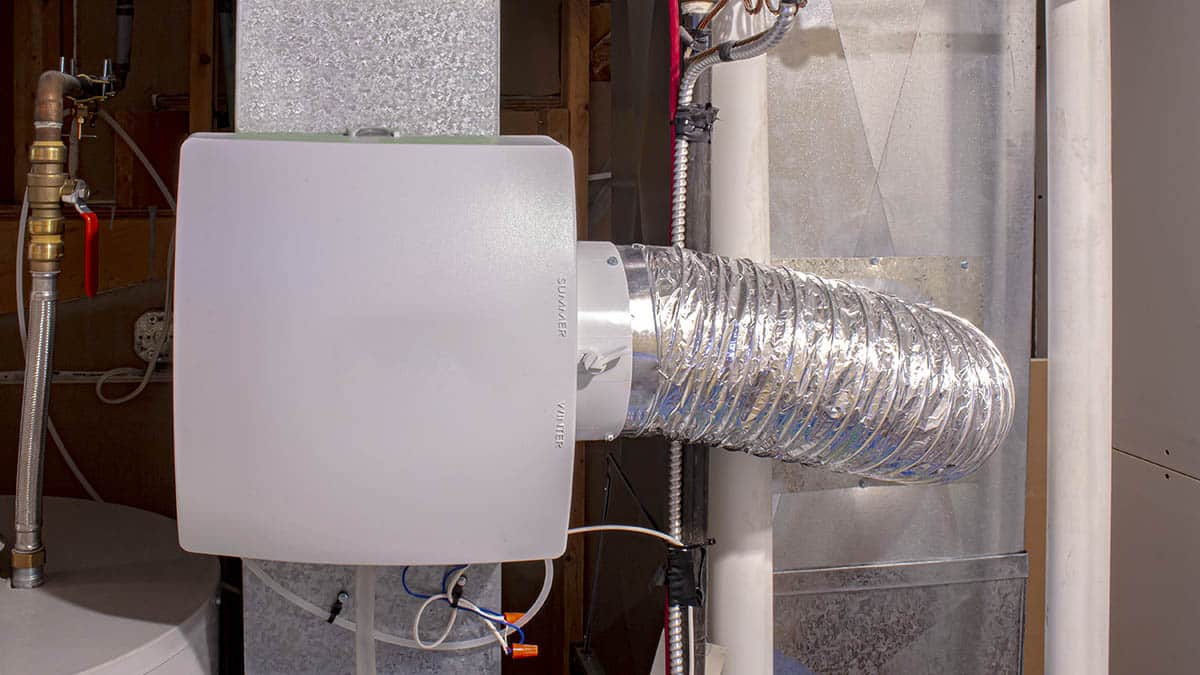
The photo of the moldy humidifier below is from a house that was only a year or two old. Although the home builder had installed closed cell spray foam insulation in all the above-grade walls and the attic, he left the crawl space vented to the outside. The result was mold growing on the HVAC system.
Let’s just say this is your worst option unless you’re in a dry climate and quickly move on to the better choices.
Conclusion: This is your worst option in humid climates. It’s probably also worst for most climates if the HVAC systems and ductwork are located in the crawl space.
2. Supply air from the HVAC system
If you encapsulate the crawl space, adding a little bit of air from the HVAC system is probably the most common method used. If there’s already a duct system down there, it’s easy and inexpensive to do. The air from the system helps to dry out the crawl space air.
But it also puts the crawl space under a slight positive pressure and the house under a slight negative pressure. Is that a problem? Not according to Advanced Energy‘s Closed Crawl Spaces guide:
In Advanced Energy field tests, the small crawl space airflow causes a negligible pressure effect that is far exceeded by the effects of duct leakage, stack pressure or wind-induced pressures in the building.
How much supply air do you need to add to the crawl space? Advanced Energy recommends 1 cubic foot per minute (cfm) for each 30 square feet of crawl space floor area. The International Residential Code (IRC) recommends 1 cfm per 50 square feet:
Conditioned air supply sized to deliver at a rate equal to 1 cubic foot per minute (0.47 L/s) for each 50 square feet (4.7 m2) of under-floor area, including a return air pathway to the common area (such as a duct or transfer grille), and perimeter walls insulated
If you go this route, it may work well in the summer if the air conditioner is sized properly. If the system runs long enough, it can provide enough dry air to the crawl space to keep the relative humidity below 70%, where you want it.
In the swing seasons, however, and in homes with oversized air conditioners, this method may not work well. Another thing about this method that I’m not crazy about is that you’re conditioning the crawl space based on the conditions in the finished space above. The crawl space has its own conditions, though, and may or may not respond well to controls in another place.
Conclusion: Although it’s the most common method of treating the air in encapsulated crawl spaces, it may or may not work well.
3. Exhaust air to the outside
First, note that I’m not talking about the crazy idea to put large fans in the crawl space to exchange large quantities of air between the outdoors and the crawl. (Yes, companies really do promote this, and it’s a quick way to rot the wood in your crawl space.) I’m talking about a small exhaust fan, as described in the IRC. Here’s the language from the code:
Continuously operated mechanical exhaust ventilation at a rate equal to 1 cubic foot per minute (0.47 L/s) for each 50 square feet (4.7m2) of crawlspace floor area, including an air pathway to the common area (such as a duct or transfer grille), and perimeter walls insulated
So a 2000 square foot crawl space would need a 40 cfm exhaust fan. It’s pulling just a little bit of air from the crawl space. The problem is that you don’t really know where the makeup air for the crawl space is coming from. Yes, the code specifies a pathway for air to move into the crawl space from the house, but air doesn’t always follow those arrows in the diagrams. If the band joist isn’t sealed well, for example, it may pull a lot of the air from outdoors, which isn’t really what you want.
Conclusion: It could work but is probably less reliable than supply air from the HVAC system.
4. Install a dehumidifier
In this method, you use a standalone dehumidifier for the crawl space. (Again, we’re talking about encapsulated crawl spaces only; although some people try, you can’t dehumidify the whole outdoors.) It’s controlled by the conditions in the crawl space, not the house above, so it this method will do the best job of keeping the crawl space dry.
If you want dry air in your crawl space, a dehumidifier is the way to go. Yes, they do have drawbacks. You have to buy additional equipment. They require maintenance. If the drain fails, you may have a bulk water problem in the crawl space.
If it’s a small crawl space, a standard dehumidifier that you can buy for $200 to $300 may be sufficient. For medium to large crawl spaces, however, it’s best to go with a more robust model, like the ones made by Therma-Stor. Their Santa Fe line is made for basements and crawl spaces. The dehumidifier photo below shows an older Santa Fe model made just for encapsulated crawl spaces.
Conclusion: Although more expensive, installing a dehumidifier is the best method for treating the air in an encapsulated crawl space.
5. Connect the crawl space to the house with a transfer grille
Both of the quotes from the building code that I mentioned above include the following language:
…including a return air pathway to the common area (such as a duct or transfer grille)
What they’re saying is that if you pressurize the crawl space with supply air or depressurize it with an exhaust fan, they want the crawl space to be able to communicate with the house above to relieve the pressure. The easiest way to accomplish this is with a transfer grille right in the floor, as you see in the photo below.
Advanced Energy isn’t a fan of this method, instead recommending that the entire floor be air sealed to isolate the crawl space from the house. There are some good reasons for this. If, for example, the intent of the opening is for house air to move downward (as in the case of the exhaust fan), the stack effect may win out if the crawl space isn’t perfectly sealed to the outside.
Another potential problem is pollutants in the crawl space air migrating into the house. These could be soil gases such as radon or fumes from paints, pesticides, or fuel stored in the crawl space. Also, if the crawl space access door is left open, it may not be discovered for some time. Meanwhile, the house is directly connected to the outside through that transfer grille.
Is it ever OK to install a transfer grille? Sure. In the house where I took the photo above, there’s no access to the crawl space from outside, and the owner (a guy who only recently learned the correct pronunciation of his name) doesn’t store hazardous chemicals down there (unless you consider wine hazardous).
Dr. Joseph Lstiburek, whose transfer grille you can see in the photos below, thinks that mixing house and crawl space air is fine in some cases: “If your crawlspace is ‘clean,’ connecting it to the rest of the house is ok. If it is not clean then you should not do so. In trashed crawlspaces sucking on them with a continuous exhaust fan works well. In clean crawlspaces up North, transfer grilles work just fine. In between and in the South, a very small amount of return air works fine with a transfer grille as does a small amount of supply air with a separate fan that does not blow cold air from the HVAC system but blows house air that is warmer and drier.”
The bottom line
If I had to say one method was better than any other to deal with the air in a crawl space, it would be to encapsulate it and install a dehumidifier. Adding supply air from the HVAC system can be tricky and may let the crawl space humidity go too high in spring and fall. An exhaust fan may be OK in some cases. One thing I’d recommend above all else, though is to monitor the air. Install a digital thermo-hygrometer with a remote sensor so the homeowners can keep an eye on what’s happening to the humidity levels there.
Now, go out there and turn your dank, musty crawl spaces into beautiful, healthy space!


